


How Do You Design an Eye Clinic Exam Room for Maximum Patient Throughput?
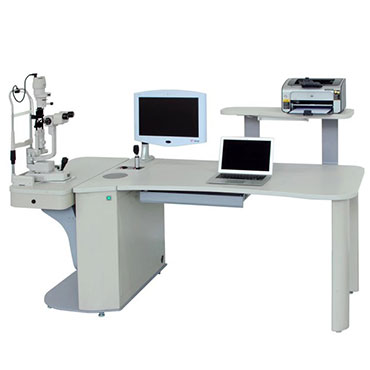
Every extra minute in the exam room is money lost, and most clinic layouts waste space without anyone noticing. We have equipped hundreds of clinics and watched their traffic patterns. The layout decides your daily patient count before you open the doors.
You design an exam room for throughput by sizing one lane correctly, placing slit lamp, refraction unit, and tonometer in a single traffic flow, meeting lighting and power standards, and matching the layout to your patient volume model.
This article explains the design decisions that push a room from eight patients a day to fifteen. Apply them when you build, because fixing layout after opening is expensive.
What is the ideal square footage for a single ophthalmic exam lane?
Rooms that are too small slow every move, and rooms that are too large waste rent. There is a tested size range that balances both.
A single ophthalmic exam lane works best at 120 to 150 square feet, plus a separate space for pretesting. At this size, a well-designed lane handles 12 to 16 patients per day, while cramped rooms stall at six to eight.
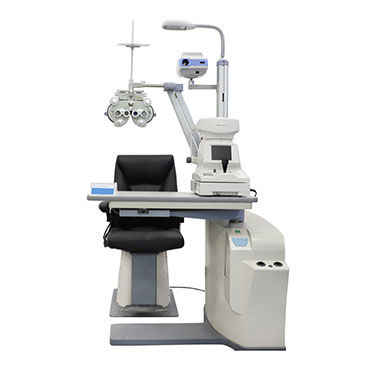
We see clinics squeeze a lane into 90 square feet and then wonder why the day runs late. The equipment needs clearance, the patient needs a path, and the staff needs room to move. Space is not luxury, it is throughput.
The minimum workable size
Below 110 square feet, the slit lamp arm hits the wall and the refraction chair blocks the door. Staff walk around each other instead of working. The room feels busy but produces little, and that is the worst combination in a clinic.
The comfort zone
Between 120 and 150 square feet, every device sits within one or two steps. The patient moves in a short loop from chair to slit lamp and back. This zone fits most rooms because it works for both a compact layout and a room with a bit of extra width.
Pretesting deserves its own space
Visual field and OCT testing need a dark, quiet corner, so give pretesting its own nook or room. Sharing one room for refraction, slit lamp, and field testing forces constant reconfiguration. We recommend a separate pretest area whenever the building allows it.
| Room size | Patients per day | Best use |
|---|---|---|
| Under 110 sq ft | 6 to 8 | Low-volume only |
| 120 to 150 sq ft | 12 to 16 | Standard lane |
| Over 150 sq ft | 14 to 16 | Multi-function room |
How do you position slit lamps, refraction units, and tonometers for workflow efficiency?
Equipment position controls the traffic loop, and the loop controls your speed. A poor arrangement makes the patient criss-cross the room three times per visit.
Place the lane in one clockwise loop: patient entry, pretest corner, refraction chair, slit lamp, then exit. Keep the tonometer beside the slit lamp, and face the refraction unit so the doctor can turn from chair to slit lamp without standing.

The fastest clinics we equip share one design habit: the patient never walks backward. Everything flows in one direction, and the doctor rotates between stations like a pilot in a cockpit.
The clockwise loop
Start the patient at the entry side with the history desk. Move them to the pretest corner for auto-refraction and field screening. Seat them at the refraction chair for the exam, then slide the chair or the slit lamp into position for the anterior segment check. The patient exits on the far side while the next patient enters behind them.
Integrated units save real minutes
An integrated refraction unit combines the chair, the slit lamp arm, and the instrument table in one powered station. The doctor swings the slit lamp into place instead of asking the patient to move. This cuts setup time by roughly 40 percent, and over fifty patients a day, that saving is a full extra hour of capacity.
Tonometer placement
Keep the tonometer within arm’s reach of the slit lamp, because glaucoma checks happen during the slit lamp exam. A rebound tonometer that lives on the slit lamp table adds one touch to the exam. A tonometer stored across the room adds a minute and breaks the flow.
| Station | Position | Distance from chair |
|---|---|---|
| Refraction chair | Center of loop | Base |
| Slit lamp | Left of chair | Swing arm |
| Tonometer | On slit lamp table | Arm's reach |
| Pretest corner | Near entry | Few steps |
What lighting and power requirements should every exam room meet?
Lighting errors ruin both the exam quality and the equipment. Doctors need dim light for the retina exam and bright task light for paperwork, and the room must deliver both on demand.
Install dimmable overhead lighting with a range from bright task light to near-darkness, blackout window coverings, and dedicated grounded power circuits for each device. Add surge protection, because voltage spikes are the top cause of slit lamp and OCT failures.

A fundus exam needs the room dark enough that the pupil opens, and a refractive exam needs controlled light that does not glare. Rooms that cannot go dark force doctors to compromise, and compromises cost diagnostic accuracy.
Lighting zones
Install three lighting levels in one dimmer system: full brightness for cleaning and paperwork, medium for the refractive exam, and near-dark for fundus work. Put the switch near the chair so the doctor controls it without leaving the patient. Window coverings must block daylight completely, because afternoon sun ruins every retina exam.
Power that protects your investment
Every powered device needs its own grounded circuit, because sharing circuits causes flicker and resets. Add a surge protector or an uninterruptible power supply for the OCT and the fundus camera, since those units hold sensitive electronics. We have seen voltage spikes damage devices within the first month, so protect before you install.
The layout of outlets
Place outlets at each device station, not just on one wall. A refraction unit needs power at the floor, and the slit lamp needs it at table height. Extension cords across the patient path are a trip hazard and a clinic liability.
| Requirement | Standard | Why |
|---|---|---|
| Overhead light | Dimmable, 3 levels | Exam control |
| Windows | Full blackout | Retina exams |
| Circuits | One per device | Stable power |
| Surge protection | UPS for OCT | Protects sensors |
| Outlets | At each station | No trailing cords |
How does room layout differ between a high-volume clinic and a boutique practice?
Volume changes everything about the layout. High-volume clinics engineer for speed, and boutique practices engineer for comfort. Trying to do both in one room usually does neither well.
High-volume clinics use straight-line flow, dedicated pretesting, and integrated lanes to push past 15 patients per doctor per day. Boutique practices use wider rooms, comfortable seating, and shared consult space, because their revenue comes from experience and high-value procedures.
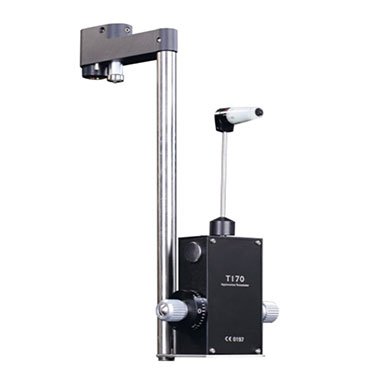
The same equipment serves both models, but the room around it does not. We design these two layouts differently because the business goals are different.
The high-volume model
High-volume clinics want the exam itself to take the same time for every patient, so the layout standardizes the loop. Dedicated pretesting keeps the main room free for the doctor. Two exam lanes can share one pretest room, and that ratio supports a steady queue without empty rooms.
The boutique model
Boutique practices see fewer patients and spend longer with each one. Their rooms are wider, with a lounge chair for the companion and space for counseling. The equipment still follows the clockwise loop, but the pace is slower and the room does double duty as a consult space.
Shared decisions
Both models need the same power and lighting standards, and both benefit from integrated refraction units. The difference is the space budget around the equipment, not the equipment itself. Match the layout to the revenue model and the room pays for itself.
| Feature | High-volume | Boutique |
|---|---|---|
| Pretesting | Separate room | Shared corner |
| Room width | Standard lane | Wider |
| Patient flow | Straight line | Relaxed loop |
| Daily target | 15 plus | 6 to 10 |
| Primary goal | Speed | Experience |
Conclusion
Build each lane at 120 to 150 square feet with a clockwise flow and integrated equipment. Install dimmable lighting and protected power. Match the layout to your patient volume model.