

What Ophthalmic Equipment Do You Need to Launch a Pediatric Eye Care Service?
Kids squirm, cry, and refuse the chin rest. Adult-sized exam lanes scare them, and adult test protocols do not fit short attention spans. So many clinics delay pediatric services for years.
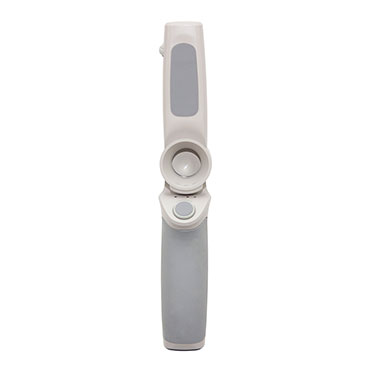
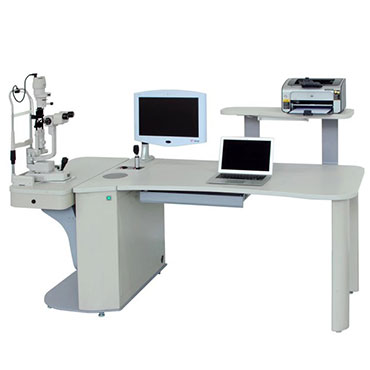
You need equipment built for small bodies and short attention. We at Hongdee supply portable slit lamps, non-mydriatic fundus cameras, low chin-rest configurations, and fixation targets, so a children’s lane needs no second set of expensive machines.
Demand is rising fast. Parents now expect eye checks at age three, and schools push screening programs. A pediatric service is a real revenue line, not a side project. Here is the equipment list we recommend to clinic owners and distributors who ask us this exact question.
How does a pediatric eye exam differ from an adult exam in equipment needs?
Children do not cooperate on command. Pupils dilate fast, heads drift off the rest, and fixation lasts seconds, not minutes. Adult protocols simply do not fit their bodies.
Pediatric exams need shorter working distances, cartoon fixation targets, lower chin rests, and non-mydriatic imaging. That is why we configure slit lamps with a low chin-rest range and recommend non-mydriatic fundus cameras for every child lane.
Why non-mydriatic imaging matters
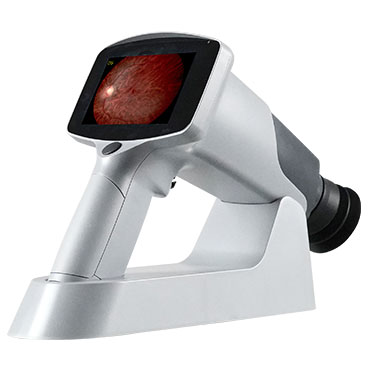
Dilating drops distress children. They sting, blur vision for hours, and make parents nervous. A non-mydriatic fundus camera captures a retinal image through an undilated pupil in one quiet moment. We have watched clinics grab usable pediatric fundus photos in under ten seconds per eye. That speed matters because a child’s cooperation window is short. So the camera must be ready before the child arrives, not after.
Fixation and working distance
Children fixate better on near targets than far ones. Built-in LED fixation lights and cartoon targets keep kids aligned while you photograph. A shorter working distance also lets you move fast before the child shifts. Small design details decide whether you go home with useful images or with empty hands.
Exam time design
The whole lane changes for children, not just one machine. Look at how each step shifts:
| Exam step | Adult approach | Pediatric approach |
|---|---|---|
| History taking | Standard interview | Short talk with parents |
| Visual acuity | Letter charts | Picture and matching charts |
| Refraction | Longer autorefractor dwell | Fast handheld autorefractor |
| Anterior segment | Standard slit lamp | Portable or low-rest slit lamp |
| Retinal imaging | Mydriatic fundus camera | Non-mydriatic camera |
| Eye pressure | Applanation at slit lamp | Rebound tonometer, no drops |
One more rule
Never force a child into position. If a machine cannot come to the child or adjust down to the child, replace it. We see clinics lose trust in minutes when an exam becomes a wrestling match, so flexible equipment pays for itself fast.
Which slit lamp and refractometer configurations work best for young children?
A tall chin rest and a heavy table defeat you before the exam starts. If the child cannot reach the machine, nothing else you own matters.
Use a slit lamp with a low chin-rest range, a joystick that glides softly, and dimmable LED light. Pair it with an autorefractor that measures both eyes in seconds, so the child is done before boredom starts.
Slit lamp features we pick for pediatrics
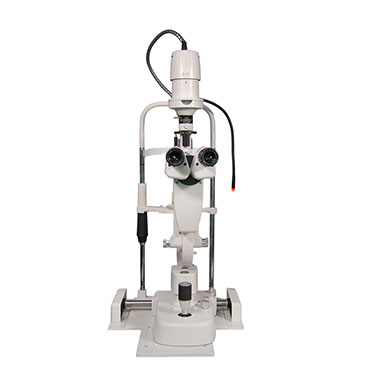
Choose a five-step slit lamp so you can widen the field fast and then zoom in for a single look. LED illumination reduces heat near the child’s face, and a low base lets small heads reach the rest without a step stool. We also set the joystick tension light, because a stiff joystick makes fine focus slow.
Refraction speed is everything
We place an auto refractometer in pediatric lanes because it finishes both eyes in seconds. Manual refraction takes minutes, and minutes are the enemy here. A handheld autorefractor works for infants who cannot sit at a unit at all, so keep one within reach.
Positioning accessories that work
Some clinics add a parent’s knee chair. The child sits on a lap and leans gently into the chin rest, and that one trick removes most of the fear. A small step stool gives older children a sense of control, which they love.
Configuration checklist
| Accessory | Why it helps |
|---|---|
| Low chin rest | Lets ages 3 to 6 reach the lamp |
| Soft joystick | Fast refocus before movement |
| Dim LED light | Less glare and squinting |
| Handheld autorefractor | Works on infants and toddlers |
| Fixation toy holder | Keeps the second eye aligned |
| Parent knee chair | Steadies and calms the child |
Small changes like these decide whether a child exam takes four minutes or twenty.
What vision screener options exist for children under five?
Under age five you cannot get reliable acuity from standard letters. Many clinics stall here and send kids away until school age, and that delays amblyopia treatment by years.
For children under five we recommend photoscreeners, handheld autorefractors, and picture optotype charts. These tools screen refractive error and alignment without verbal answers, and portable versions work in any room of your clinic.
Photoscreeners for the youngest patients
A photoscreener photographs both eyes from arm’s length and flags refractive error, strabismus, and media opacities. The child only looks at a sound-and-light target, so no verbal response is needed. That makes it the fastest door for screening at age two and three.
Handheld and portable instruments
Portable devices win under five because the child stays wherever they feel safe. A handheld autorefractor and a portable slit lamp bring the exam to the child instead of forcing the child to the machine. We ship many portable units to clinics that run school screening camps, and portability is the reason they work there.
Picture optotype charts
Once a child can point, use symbol charts. Matching games with picture optotypes give you a real acuity number while the child thinks they are playing. Combine them with auto refraction and you get a screening signal you can trust.
Which screener fits which age
| Age | Best screener |
|---|---|
| Birth to 2 | Photoscreener with sound target |
| 2 to 4 | Handheld autorefractor and photoscreener |
| 4 to 5 | Picture optotype chart plus auto refraction |
| 5 and up | Standard charts with a low-rest slit lamp |
Under five the goal is a fast pass-or-refer signal, not a perfect prescription.
How do you design a child-friendly exam room that reduces patient anxiety?
White walls, bright lights, and cold metal chairs tell a child that something bad will happen. Anxiety destroys cooperation, and cooperation is the entire exam.
Build the room around distraction and comfort. Use soft lighting, a play corner, wall decals, and a chair the child can climb into. We design our exam furniture to feel smaller and friendlier for pediatric lanes.

Warm up before the exam
Let the child touch the joystick and spin the chair before you switch anything on. Ten seconds of play removes most of the fear. We tell our clinic partners to do every scary step last, and to let the parent talk in a calm voice through the whole visit.
Light and sound control
Dimmable LED lighting helps more than most people expect. Bright halogen light startles children, and loud motors do too. Our LED slit lamps dim low and stay cool, so the child sees a soft glow instead of a blinding lamp.
Room layout
Put the equipment you use first closest to the door. Do the photoscreener and handheld checks in the play area, then save the slit lamp for the end. That order keeps the child relaxed when the hardest part arrives.
Anxiety-reducing design ideas
| Design move | Why it works |
|---|---|
| Play corner at the entry | Positive first impression |
| Wall decals at eye level | Familiar and safe feeling |
| Dimmer switches | Gentler lighting control |
| Step stool and small chair | Child can climb independently |
| Ceiling fixation stickers | Target during imaging |
| Parent seat beside the chair | Reassures and steadies the child |
Conclusion
Start a pediatric service with portable instruments, a non-mydriatic camera, low chin rests, and fun fixation targets. Then design the room to calm kids. We at Hongdee can configure a full children’s lane from our existing catalog.