


What Is a Lensmeter and How Do You Choose the Right One for Your Practice?
Every pair of glasses that leaves your practice carries a prescription, but who checks that the lenses match it? Many optical shops skip the final verification, and patients pay for that mistake with headaches.
A lensmeter measures the power of finished lenses, so you can verify that glasses match the prescription before the patient wears them. We recommend an auto lensmeter for busy practices because it reads sphere, cylinder, axis, and more in seconds.
Lensmeters sit in every optical practice and every clinic with a dispensing counter. Yet few buyers understand the difference between manual and automatic models, or the accuracy standards that matter. We break it all down here.
What is the difference between a manual lensmeter and an auto lensmeter?
A manual lensmeter asks the operator to focus lines and read a scale. An auto lensmeter does the same job electronically and prints the numbers. The difference shows up in speed and in training time.
A manual lensmeter takes 2 to 3 minutes per lens in the hands of a skilled operator. An auto lensmeter measures sphere, cylinder, axis, addition, and prism in seconds, and it prints the result, so staff errors drop sharply.
How manual lensmeters work
You place the lens on the stage, focus the target, and read the power from scales. Manual units are durable and need no power supply, but they demand trained eyes. Reading the axis line and the cylinder scale correctly takes practice, and two operators can read the same lens differently.
How auto lensmeters work
An auto lensmeter scans the lens electronically and displays all values on a screen at once. The operator aligns the lens and reads the result, and most models print a ticket for the patient record. That ticket is a strong quality signal for your practice.
Which practice needs which
A single-doctor optical shop may run fine on a manual unit. A busy dispensing practice with high volume should go automatic, because the speed difference pays for the unit quickly.
Manual versus auto at a glance
| Feature | Manual lensmeter | Auto lensmeter |
|---|---|---|
| Measurement time | 2 to 3 minutes per lens | Seconds per lens |
| Training needed | Significant | Minimal |
| Operator influence | High | Low |
| Printout of results | No | Yes |
| Power source | None needed | Electric |
| UV lens detection | Limited | Available |
The skill question
Manual meters teach your staff real optics, and that knowledge is valuable. But if your goal is fast, consistent verification, an auto lensmeter gives the same result every time, from any staff member.
How do you verify toric and progressive lens prescriptions with a lensmeter?
Toric lenses correct astigmatism, and progressive lenses correct presbyopia. Both are easy to get wrong, because their markings hide until you know where to look.
For toric lenses, check sphere, cylinder, and axis against the prescription. For progressives, verify the distance power in the upper zone and the addition power in the lower zone, and mark the fitting cross before you hand the glasses over.
Verifying a toric lens
Place the lens and read the sphere and cylinder values, then confirm the axis matches the prescription within tolerance. A toric lens that is off-axis by five degrees creates blur and asthenopia, so check the axis on every single pair.
Verifying a progressive lens
Progressives have a distance zone on top and a reading zone below. Measure the distance power in the upper area, then slide down to the reading area and measure the addition. Compare the addition with the prescription, because labs mix up adds more often than anyone admits.
Marking before dispensing
Mark the fitting cross and prism reference point before you remove the lens from the meter. The lab marks wipe off fast, and unmarked progressives are painful to re-verify later.
Verification steps for complex lenses
| Lens type | What to verify | Tolerance tip |
|---|---|---|
| Single vision sphere | Sphere power | Match prescription exactly |
| Toric | Sphere, cylinder, axis | Axis within 3 to 5 degrees |
| Progressive | Distance power and addition | Check both zones |
| Prism | Prism direction and amount | Confirm base direction |
When numbers do not match
When a lens fails verification, do not adjust the record to fit. Send it back to the lab with the readings, because the problem is the lens, not your meter.
What accuracy specifications should a professional lensmeter meet?
A lensmeter that reads wrong is worse than no lensmeter, because it confirms bad lenses with false confidence. Accuracy standards exist to stop that.
A professional lensmeter should meet ISO 8598, with sphere accuracy within about plus or minus 0.06 diopters. Look for models that state their accuracy openly and come with a calibration certificate.
The ISO 8598 standard
ISO 8598 is the international standard for lensmeters. It defines how the instrument measures and how accurate it must be. A meter that states ISO 8598 compliance gives you a defensible accuracy claim when a patient or lab questions a reading.
Reading the accuracy numbers
Accuracy is stated in diopters. Sphere accuracy of plus or minus 0.06 diopters means the reading can differ from the true power by only six hundredths of a diopter. Cylinder and axis have their own tolerances, so check the full specification, not just the headline number.
UV detection is becoming standard
Modern lenses block UV light, and practices increasingly check that the blocking layer is really there. Auto lensmeters with UV detection confirm the filter in seconds, and we build UV detection into our auto lensmeter for that reason.
Specifications to compare
| Specification | What to look for |
|---|---|
| Sphere accuracy | About plus or minus 0.06 D |
| Cylinder range | At least plus or minus 10 D |
| Axis readout | 1 degree steps |
| Prism range | At least 10 prism diopters |
| UV detection | Built-in lensmeter option |
| Standard | ISO 8598 compliance stated |
Match accuracy to your work
Dispensing shops need full accuracy on every lens. A verification-only counter may accept slightly wider tolerance, but we advise buying the most accurate meter you can afford, because accuracy is the product you sell.
How do you maintain and calibrate a lensmeter to keep readings reliable?
Lensmeters drift. The internal reference shifts with bumps, dust, and age, and a drifted meter prints wrong numbers that your practice then ships to patients.
Calibrate your lensmeter yearly and check it with certified test lenses after any move or impact. Keep it clean, cover it when unused, and log every calibration so you can prove your readings were correct.
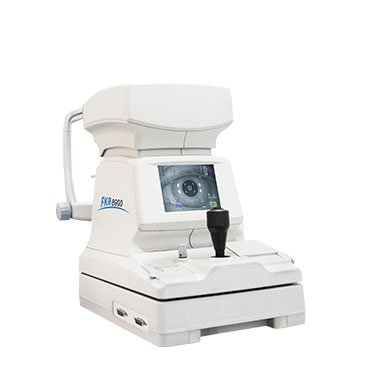
Cleanliness comes first
Dust on the stage or the lens holder shifts readings. Wipe the stage and holder daily, clean the screen carefully, and keep the meter covered overnight. In dusty regions, a cover is not optional.
Yearly calibration
Send the meter for calibration at least once a year, or follow the maker’s interval. The service should include a certificate you can file, because that certificate protects you if a patient ever disputes a prescription.
Watch for drift signs
If the same lens reads differently than it did last month, stop and calibrate. If a known test lens fails by more than the stated tolerance, take the meter out of service until it is fixed.
Maintenance calendar
| Task | Frequency |
|---|---|
| Clean stage and holder | Daily |
| Check with test lens | Weekly |
| Full clean and inspection | Monthly |
| Certified calibration | Yearly |
| Calibration after impact | Immediately |
Calibrate your staff too
A good meter in untrained hands still fails. Train every operator in alignment technique and reading verification, because the human step decides whether the meter’s accuracy reaches the patient.
Conclusion
Choose an auto lensmeter for speed and consistency, verify toric and progressive lenses on every pair, and buy to ISO 8598 accuracy with UV detection. Then calibrate yearly. We at Hongdee supply lensmeters that meet professional accuracy standards.