


Dry eye patients walk past your door every week, but you send them away with drops and a shrug. That is a service line walking out the door.
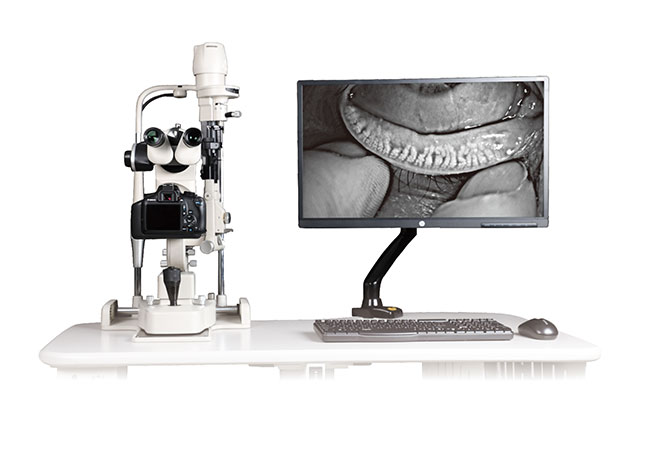
A dry eye service needs a slit lamp with meibography imaging, a tear film assessment station, and a documentation system. The minimum viable setup fits in one exam lane and pays for itself through patient conversion.
So what should you buy first? In this article I’ll show why dry eye is a growth service for optometry, what the minimum viable setup looks like, what meibography adds beyond a standard slit lamp, how to document findings for patient education, and how to phase the investment over two to three years.
Why Is Dry Eye a Growth Service Line for Optometry?
Screen time, contact lenses, and aging populations are all growing dry eye complaints. Yet most practices still treat it as an afterthought.
Dry eye is a growth service line because complaints are rising while most clinics lack diagnostics. Adding a dedicated exam path turns walk-ins into returning patients — and gives you a service competitors cannot easily copy.
The Demand Is Already There
Look at your own waiting room. Patients with gritty, burning, watery eyes arrive every week — often middle-aged, often contact lens wearers, often glued to screens all day. Many have tried pharmacy drops and given up. They are not asking for a diagnosis by name. They are asking for someone to take the problem seriously. A practice with dedicated dry eye equipment can answer that question on the spot.
Why Patients Leave Without a Service
Without diagnostics, the exam ends with general advice and a referral elsewhere. The patient leaves, and the revenue leaves with them. With a meibography image on the screen, the same patient sees a real finding, understands the issue, and books a follow-up. That is the difference between a one-time visit and a long-term patient.
| Without a dry eye service | With a dry eye service |
|---|---|
| Walk-in gets advice, no follow-up | Walk-in gets imaging, books follow-up |
| Referrals go to competitors | Referrals stay in-house |
| No equipment revenue | Exam fee plus consumable revenue |
| One of many clinics | The local specialist |
A Low-Barrier Entry Point
The equipment does not need a dedicated room. One exam lane, one slit lamp with meibography, and one trained operator are enough to start. That low barrier is exactly why dry eye services are spreading through optometry practices in Europe, Australia, and the Middle East right now.
Which Diagnostic Tools Form the Minimum Viable Setup?
You do not need a full dry eye lab to start. A focused minimum setup can begin evaluating dry eye cases within weeks.
The minimum viable setup is a dry-eye slit lamp with infrared meibography, plus a documentation tool for tear film findings. Both fit on one exam lane and reuse your existing room and table.
The Two-Tool Core
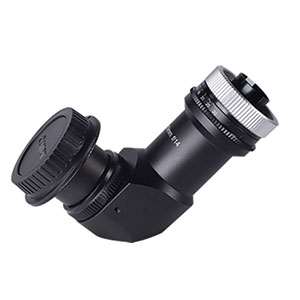
The core is smaller than you think. First, a dry-eye slit lamp with infrared meibography imaging, so you can see the meibomian glands in the eyelids. Second, a way to record findings — either the slit lamp’s imaging system or a camera adaptor attached to it. That is the working minimum. Everything else, such as additional tear film assessment tools, is an upgrade you can add later.
Why the Slit Lamp Is the Hub
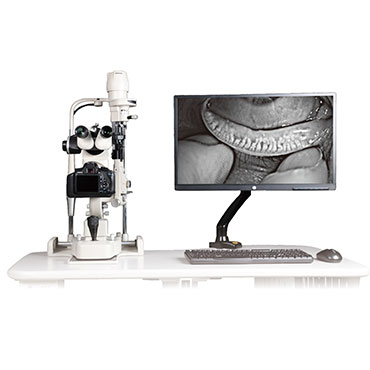
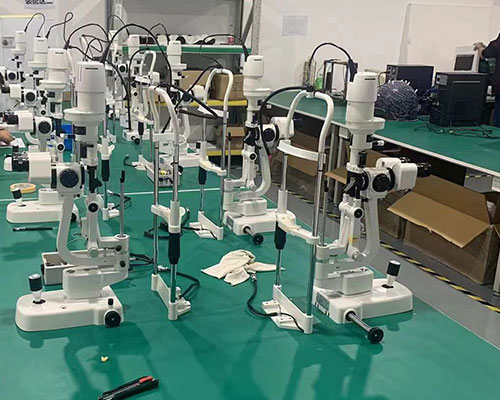
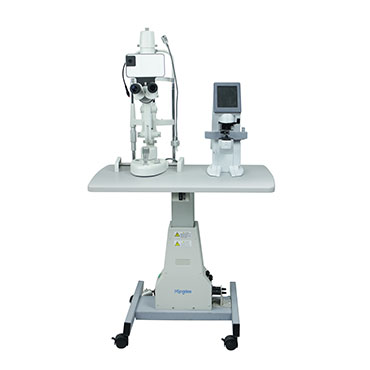
The slit lamp is already in your exam room, so you are not building a new space. You are upgrading the tool you use every day. Hongdee’s dry-eye slit lamp keeps the standard exam functions and adds infrared meibography imaging in one unit. LED illumination, slit width from 0 to 14 mm, slit length from 1 to 14 mm, and a 0 to 180 degree slit angle give you the flexibility a busy lane needs.
| Tool | Role in the service | When to add |
|---|---|---|
| Dry-eye slit lamp with meibography | Core imaging | Day one |
| Camera adaptor | Store and show images | Day one |
| Additional tear film tools | Deeper assessment | Phase two |
| Second exam lane | Higher volume | Phase three |
Filters Built for the Job
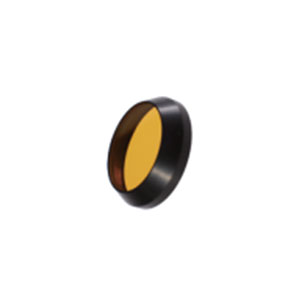
The lamp carries several filters — colorless, heat absorption, grey, red-free, and cobalt blue. Each supports a different part of the exam. You do not need to master all of them at launch. Start with the imaging basics, then build skill filter by filter as your caseload grows.
What Does Meibography Add Beyond a Standard Slit Lamp?
A standard slit lamp shows the front of the eye. It cannot show you the glands that produce the tear film’s oil layer. Meibography can.
Meibography images the meibomian glands in the eyelids, so you can see gland structure directly. That turns a subjective complaint into a visible finding patients understand and act on.
Seeing the Invisible
The meibomian glands sit inside the eyelids and secrete the oil layer of the tear film. When glands are lost or blocked, the tear film becomes unstable and the eye feels dry — even when the patient produces plenty of tears. A standard slit lamp cannot show you the glands. Infrared meibography can, without drops and without touching the lid. The eyelid is everted briefly, the infrared image is captured, and gland structure appears on screen.
The Image That Changes the Conversation
This is the part I want you to remember. Dry eye is one of the few service lines where the diagnostic image itself drives patient conversion. Patients rarely understand tear film science, but they understand a picture of their own eyelids showing fewer glands than expected. Showing the patient their own meibography image changes how seriously they take the findings and how likely they are to follow the plan you agree on together.
| What you can see | Standard slit lamp | Meibography slit lamp |
|---|---|---|
| Front of the eye | Yes | Yes |
| Gland structure | No | Yes |
| Gland loss over time | No | Yes, with stored images |
| Patient-facing evidence | Limited | Strong |
A Workflow, Not a New Specialty
Adding meibography does not turn your practice into a dry eye laboratory. It adds one image to an exam you already run. The operator learns the capture step in a short training session, and the image becomes part of the patient record. That is the point: the capability expands your service without expanding your staff.
How Do You Document Findings to Support Patient Education?
A finding you cannot show the patient is a finding they will ignore. Documentation turns your exam into their decision.
Capture the meibography image, annotate gland areas, and store it in the patient record. Showing the patient their own image at the chair changes how seriously they take the plan.
The Image Is the Message
Think about how you present any finding. If you describe it in words, the patient nods and forgets. If you show it on a screen, the patient leans in and asks questions. Meibography gives you that second conversation. “Here is your upper lid at the first visit, and here is the gland area we are tracking” — that sentence, with an image, changes behaviour more than any leaflet.
Building a Simple Record
You do not need a complex database to start. A folder per patient, with the image, the date, and a short note, is enough for year one. What matters is consistency: the same capture angle, the same lighting, the same labelling. When the patient returns in six months, the new image must be comparable to the old one, or the comparison tells you nothing.
| Documentation item | Purpose | Minimum standard |
|---|---|---|
| Meibography image | Visual evidence | Saved to patient record |
| Date and side (upper/lower lid) | Tracking | Recorded every visit |
| Short operator note | Context | One or two lines |
| Follow-up image | Progress | Same capture settings |
Teaching Staff, Not Just Equipment
Documentation quality is a staff skill. The operator needs to know when an image is good enough to file and when to retake it. Budget time for training in your launch plan. A well-trained assistant produces records that make the whole service look professional — and that reputation is what brings referrals.
How Do You Phase Investment Across Two to Three Years?
Buying everything at once strains cash flow and fills shelves with unused gear. Phased investment matches spending to revenue.
Phase one: the dry-eye slit lamp and documentation. Phase two: add tear film assessment tools. Phase three: expand to a second lane or advanced imaging. Each phase pays for the next.
A Three-Phase Roadmap
Phase one is the core: a dry-eye slit lamp with meibography, a camera adaptor, and staff training. This is where the service starts earning. Phase two adds deeper assessment tools, chosen according to the patient mix you actually see — not what a brochure suggests. Phase three is about scale: a second lane, more appointment slots, or outreach to referring opticians. Each phase should be funded by revenue from the phase before it.
| Phase | What you buy | What it unlocks |
|---|---|---|
| One (months 0-6) | Meibography slit lamp, camera adaptor | First assessments, patient education |
| Two (months 6-18) | Tear film assessment tools | Deeper evaluations, higher fees |
| Three (months 18-36) | Second lane or advanced imaging | Volume growth, referral network |
Working with Your Supplier
Phasing works only if the supplier is still there in year two. Ask about warranty and service before you buy. Hongdee backs its equipment with a 12-month warranty, free replacement inside the warranty period, and spare parts support, and we have served 300+ clients through 60+ distributors for over 15 years. Equipment that stays working is what makes a phased plan a safe plan.
Watch the Numbers, Not the Hype
Track three numbers from day one: how many dry eye assessments you run per month, how many patients return for follow-up, and how many come from referrals. When those climb, the next phase is justified. When they stall, retrain staff or adjust the service before spending more. That discipline keeps the service profitable while it grows.
Conclusion
Dry eye is a growth service built on visible evidence. Start with a meibography slit lamp, document every finding, show patients their own images, and phase the rest of the investment as revenue grows.