

How Do You Select an Ophthalmic Chart Projector for a Small Exam Room?
Your exam room is short, and the chart will not fit at the right distance. You squeeze the projector against the wall, and then acuity readings drift. Small rooms break standard testing rules.
In a small room you need a chart that works at short distance. An LCD vision chart solves the space problem completely, and our LCD chart supports Snellen, Tumbling E, Landolt C, ETDRS, and children’s symbols.
Projection distance, chart type, and mounting decide whether your acuity numbers mean anything. We walk through each one, so you can test accurately no matter how tight the room is.
What is the minimum projection distance for a standard visual acuity chart?
Acuity testing assumes the eye focuses at optical infinity. Standard charts are built for a 6 meter or 20 foot distance, and breaking that rule changes every letter you read.
A standard Snellen chart needs a 6 meter or 20 foot projection distance. In a shorter room you can use a mirror to fold the light path, giving the same optical distance in half the physical space, down to about 3 meters.
Why six meters matters
At distances under 6 meters the eye still accommodates, and accommodation can hide or fake refractive error. The whole point of the chart distance is to relax accommodation so you measure true refractive status.
Folding the room with a mirror
A mirror lets you test at a 6 meter optical distance inside a 3 meter room. You project the chart onto a mirror and the patient reads the reflected image. This is the classic solution, and it works, but it needs precise alignment to avoid distortion.
When the room is very short
Under about 3 meters of physical length, even a mirror struggles. That is where electronic charts take over, because they can simulate distance testing in a short space with corrected optics.
Distance options compared
| Room length | Workable solution |
|---|---|
| 6 meters or more | Direct projection, no mirror |
| 3 to 6 meters | Mirror-folded optical path |
| Under 3 meters | LCD chart with near-distance testing |
Measure your real room
Do not guess the distance. Measure from the patient’s eye position to the chart or mirror, and add the depth of the chair. An extra 30 centimeters of furniture can break an already tight layout.
How does an LCD vision chart compare to a traditional chart projector?
Chart projectors have served clinics for decades, but they come with limits. Bulbs fade, slides scratch, and the unit demands a long throw distance.
An LCD vision chart displays letters on a screen at a controlled luminance, needs no projection distance, and switches charts in an instant. It fits small rooms, never fades, and offers many more optotype sets than a slide wheel.
The case for the classic projector
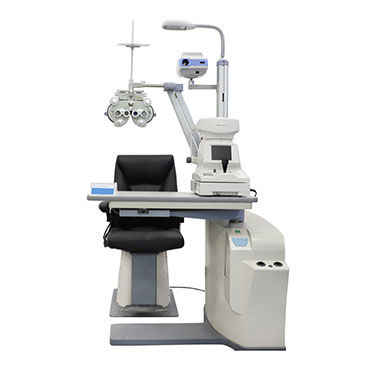
Traditional projectors are proven and simple. They project a bright chart over a real distance, and many clinicians trust their look. But the lamp dims with age, slides get dusty, and the unit needs mounting space and throw room that small exam rooms do not have.
What LCD charts change
An LCD chart is a calibrated screen. Brightness stays stable, so testing conditions do not drift between patients. Changing charts takes a button press instead of a wheel spin, and you can show single lines, single letters, or full charts as the exam requires.
Accuracy at short distance
The key question for small rooms is distance. LCD charts designed for short-distance testing correct the optics so results match a 6 meter test. That makes them the practical answer when your room cannot stretch.
Projector versus LCD chart
| Feature | Traditional projector | LCD vision chart |
|---|---|---|
| Projection distance | Needs 6 meters or mirror | Works in short rooms |
| Chart switching | Manual slide wheel | Instant electronic |
| Brightness stability | Fades with lamp age | Stable screen output |
| Optotype options | Limited by slides | Many built-in sets |
| Maintenance | Bulb and slide care | Minimal |
Which to choose
If you have a full 6 meter lane, a projector is fine. If your room is short or you test many different patient groups, the LCD chart’s flexibility wins.
What chart types and optotype standards should a projector support?
One chart does not fit every patient. Children cannot read letters, some patients cannot name them, and glaucoma monitoring needs a different test design.
Support the main optotype families: Snellen for routine acuity, Tumbling E and Landolt C for patients who cannot read letters, ETDRS for clinical trials and glaucoma work, and picture symbols for children.
Snellen and its limits
Snellen charts are the everyday standard, with letters of decreasing size. But Snellen spacing is uneven between lines, which makes small changes in acuity hard to track. That is fine for screening and weak for research.
Tumbling E and Landolt C
Tumbling E charts ask patients which way the E points, so they work across languages and for non-readers. Landolt C rings work the same way. Both are essential when your patient cannot name letters.
ETDRS for precision
The ETDRS chart spaces letters and lines with geometric precision, so each step is equal. Glaucoma clinics and clinical trials use it to measure small changes in vision over time. If you follow glaucoma patients, an ETDRS option matters.
Chart families at a glance
| Chart type | Best for |
|---|---|
| Snellen | Routine acuity screening |
| Tumbling E | Non-readers, all languages |
| Landolt C | Precise acuity in research |
| ETDRS | Glaucoma monitoring and trials |
| Children's symbols | Pediatric testing |
Contrast matters for glaucoma
Glaucoma damages contrast sensitivity before acuity drops. A chart with contrast below about 90 percent can miss early loss, so look for charts that state their contrast and check it during the demo.
How do you mount and align a chart projector for consistent results?
A chart that tilts, sways, or sits off-center gives different readings on different days. Alignment is not decoration, because your follow-up decisions depend on the numbers.
Mount the chart on a solid wall bracket at the patient’s eye height and dead center on the testing axis. Mark the patient’s chair position on the floor, and recheck alignment after any wall work or unit move.

Choose the right mount
A wall bracket beats a stand in small rooms because it frees floor space and never gets kicked out of position. Make sure the bracket is rated for the chart’s weight, and use the fixing points the maker supplies.
Set the height and center
The chart center should sit at the patient’s eye level, and the chair should face it dead on. An off-axis chart changes apparent letter size, and that shift can cost a line of acuity that was never really lost.
Lock the patient position
Mark the floor where the chair belongs and make the chair position repeatable. If staff slide the chair around between patients, your distance changes, and changed distance means changed results.
Alignment checklist
| Task | How often |
|---|---|
| Check bracket tightness | Monthly |
| Confirm chart height and level | Monthly |
| Recheck chair floor mark | Monthly |
| Full alignment after wall work | After any change |
| Clean the screen or lens | Weekly |
Write your own protocol
Create a simple one-page check that staff run each month. Consistent testing is a habit, and the habit starts with a chart that never moves.
Conclusion
Match the chart to your room: use mirrors for mid rooms and LCD charts for short ones. Support Snellen, Tumbling E, Landolt C, ETDRS, and children’s symbols, and lock the alignment. We at Hongdee build LCD vision charts for tight spaces.