



The new slit lamp sits in the exam room, and nobody touches it. The optometrist is too busy, the assistant is unsure, and the machine quietly becomes a very expensive paperweight. We at Hongdee see this in clinics from Singapore to Algeria. The device is fine. The onboarding plan does not exist.
The short answer: train in short, scheduled blocks, not one marathon session, and make the first 48 hours after installation the training window. A large share of “defective equipment” reports turn out to be operator error, so good onboarding protects your warranty, your chair time, and your staff confidence. Done right, training takes days of habit-building, not weeks of downtime.
Here is the uncomfortable truth I have to share as a manufacturer: some of the warranty claims we investigate end up being nobody’s fault but the machine was never at fault. The setting was wrong, the calibration was skipped, or the operator was shown once and then left alone. Reframing training as a warranty-cost lever changes how you budget for it.
Why Does Poor Onboarding Look Like a Faulty Device?
When a new machine behaves oddly, the first instinct is to blame the machine. In my experience, that instinct is wrong more often than not. The symptom looks identical from the outside: the reading is off, the image is blurry, the device will not start.
Most early “faults” are settings, not failures. An operator who was not taught the daily calibration check, or who used the wrong mode, produces results that look like a broken instrument. We at Hongdee log these cases, and the pattern is consistent: clear training cuts early support calls dramatically.
The psychology is simple. Nobody wants to admit they pressed the wrong button, so the machine takes the blame. The clinic files a claim, the distributor forwards it, and the manufacturer investigates. Days pass. The machine comes back “no fault found.” Everyone lost time, and the operator still does not know the correct button.
That is why I push clinics to treat the first weeks as a training period, not a normal operating period. Every odd result in week one gets a question first: what mode was selected, was the calibration done, what did the manual say? Nine times out of ten, the answer explains the symptom.
The Real Cost of Skipping Onboarding
| What goes wrong | The visible cost | The hidden cost |
|---|---|---|
| Wrong settings used | “Faulty” reports, wasted calls | Operator confidence drops |
| Calibration skipped | Inconsistent readings | Clinic loses trust in the device |
| Nobody trained on mode B | Feature never used | The extra capability was wasted money |
| First user trains the second user | Errors compound | Bad habits become the “standard” |
What Should the First 48 Hours After Installation Cover?
The installation day is the highest-attention moment you will ever get with your staff. Everyone is curious, the machine is new, and the room is arranged around it. Use that window, and use it deliberately.
The first 48 hours should cover setup verification, the daily start-up routine, one full patient workflow, and the cleaning and shutdown routine. That is the complete survival kit. Everything else, advanced modes, special lenses, report settings, can wait for week two. We at Hongdee run this as a structured one-to-one live-stream walkthrough, so nothing gets skipped.
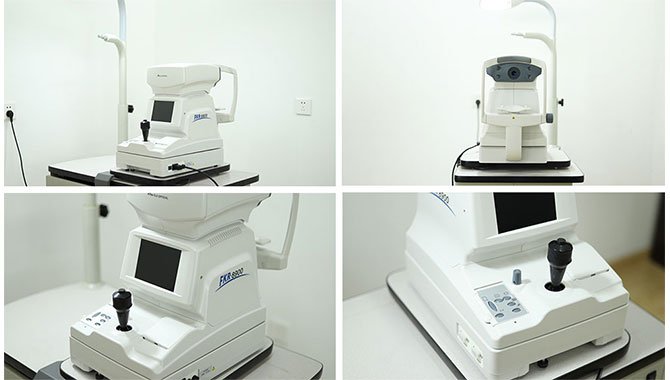
Let me break the 48 hours into four blocks, because that is how your staff will actually absorb it.
Block one: setup verification. Together, you and the trainer check that the unit matches the order, the accessories are all present, and the machine powers up correctly. This is also the moment to check the serial number, warranty start date, and registration with the supplier. Do this before anyone touches a patient.
Block two: the daily routine. The start-up check, the calibration step, the warm-up time if the machine needs one. This is the routine that prevents 80% of the “faults” I described earlier. It takes five minutes a day, and it has to become a habit from day one.
Block three: one full patient workflow. Run a real or simulated patient from start to finish. That is where questions surface. The assistant discovers they do not know how to switch modes. The optometrist discovers the printout format is wrong. Better to discover all of this on day two than on the first real patient of a busy Monday.
Block four: cleaning and shutdown. How to clean the optics correctly, what not to wipe with, and how to shut down and cover the unit. This protects the investment and it protects the warranty. A dirty optic produces a “faulty image” report, and again, it was never the machine.
The 48-Hour Schedule at a Glance
| Time | What to cover | Who should attend |
|---|---|---|
| Installation day | Setup verification, serial registration | Lead user + manager |
| Day two morning | Daily start-up routine, calibration | Every daily user |
| Day two midday | One full patient workflow | The whole clinical team |
| Day two afternoon | Cleaning, shutdown, first questions | Every daily user |
How Do You Build a Short Repeatable Competency Checklist?
Training evaporates. A week after the session, the details are gone, and everyone remembers a different version of what they were told. The fix is a written checklist that lives next to the machine, not in a filing cabinet.
A competency checklist should fit on one page, cover the daily routine, one full workflow, cleaning, and the three most common mistakes, and every user should sign it once they can do each step unassisted. We at Hongdee provide user manuals and video tutorials as the reference behind that checklist, so the paper points to the proof.
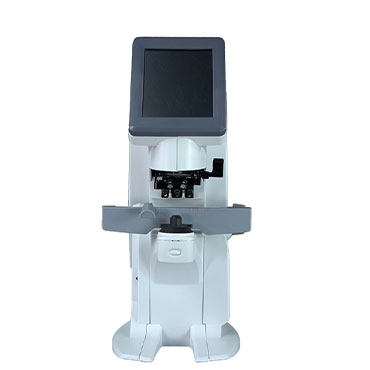
Here is the structure that works. The checklist has four sections, mirroring the 48-hour blocks. Each item is a yes or no: can the operator do this step unassisted? No essay answers, no “comfortable with” language. Yes or no, and a signature.
Section one: daily routine. Start-up, calibration, warm-up. Section two: one patient workflow from start to finish. Section three: cleaning and shutdown. Section four: the three most common mistakes for that specific machine, listed in plain language.
The signature matters more than it looks. When a new operator signs, they are committing, and the senior staff knows who to watch in week two. When a problem shows up later, the clinic can ask a useful question: did this operator sign the checklist? If not, retrain before you call the supplier.
A One-Page Checklist That Works
| Step | Done unassisted? | Trainer initials |
|---|---|---|
| Daily start-up and calibration | Yes / No | |
| Full patient workflow (measure to printout) | Yes / No | |
| Cleaning optics and housing | Yes / No | |
| Shutdown and cover routine | Yes / No | |
| Knows the 3 most common mistakes | Yes / No |
Keep the checklist to one page. If it grows to two pages, cut it. A checklist that nobody fills in because it takes too long is worse than no checklist at all.
What Should You Demand from Your Supplier’s Training Support?
Here is the question too few buyers ask before they pay: what happens after delivery? The answer separates a supplier from a vendor. I will tell you what we at Hongdee actually do, so you know what good looks like when you compare quotes.
Demand training that fits your schedule, not the supplier’s. We at Hongdee offer one-to-one live-stream product walkthroughs, video tutorials, and user manuals, and we share production progress with photos and videos while your order is being built. That is the standard you should hold any supplier to, because training support is part of the product.

Let me be specific about what to ask for, because vague promises help nobody.
Ask one: live training at your pace. Not a recorded webinar, but a live session where your staff ask questions and get answers in real time. Our one-to-one live-stream walkthroughs work exactly like that. Your team shows us the machine, we walk through the routine together, and the session stops when your team is confident, not when the clock runs out.
Ask two: reference material in plain language. Video tutorials and user manuals that a new assistant can follow alone. The manual should match the machine you bought, not a generic brochure. If a supplier cannot show you the manual before you pay, that is a warning sign.
Ask three: transparency during manufacturing. This sounds unrelated to training, but it is not. If the supplier shares production progress with photos and videos while the unit is being built, you can plan your installation and training window weeks in advance. That planning is half of good onboarding. Our on-sale service does exactly this: photos and videos of your unit as it is made.
What to Put in the Purchase Agreement
| Training support | Why it matters |
|---|---|
| Live one-to-one walkthrough after delivery | Real questions get real answers |
| Video tutorials for each model | New staff can self-train later |
| User manual in your language | No guesswork at 6 pm on a Friday |
| Production progress photos and videos | You can schedule installation early |
| Named support contact | No “the responsible person is on leave” |
How Do You Keep Skills Alive Through Staff Turnover?
The trained operator leaves, and the clinic is back to square one. This is the most common way training value disappears, and it is entirely preventable if you treat training as an ongoing process instead of a one-time event.
Beat turnover with three habits: keep the checklist and videos accessible, train a second operator as backup from day one, and make the first week of any new hire a supervised training week. The materials we provide, video tutorials, manuals, walkthroughs, mean the knowledge lives in the clinic, not in one person’s head.
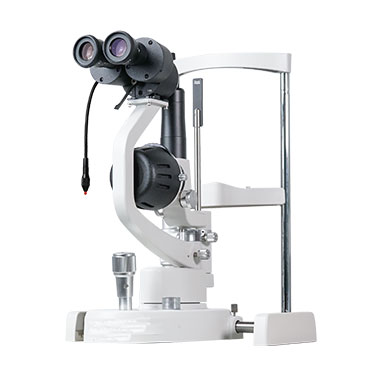
Habit one is redundancy. Never let only one person know how to run a machine. When the first operator trains, a second operator trains alongside. When the second operator leaves, the first retrains a replacement. The machine is never a single point of failure in terms of knowledge.
Habit two is the new-hire week. For the first week, a new staff member works supervised on the equipment, following the checklist with a senior colleague. That week costs a little chair time, and it saves far more. The alternative is a new hire guessing their way through week one and calling the supplier with “faults” that are just inexperience.
Habit three is refresh. Once a quarter, run a ten-minute skills check on each machine. Ten minutes, four machines, one morning. It catches the drift, the operator who has quietly stopped calibrating, the assistant who learned a faster but wrong shortcut. Small checks beat big retraining sessions.

The Turnover-Proof Routine
| Habit | Frequency | Time cost |
|---|---|---|
| Train a second operator | On every installation | Half a day, once |
| Supervised first week for new hires | Every new hire | One week, partially supervised |
| Quarterly skills refresh | Every 3 months | 10 minutes per machine |
| Update the checklist when habits change | As needed | 15 minutes |
And one more honest note. If a claim does reach the supplier, keep the training records. When we at Hongdee investigate a case, we can move fast when the clinic can show us the checklist, the signatures, and the refresh dates. It proves the operator side was handled, and it lets us focus on the machine. That is not blame; that is speed.
Conclusion
Train in the first 48 hours, keep a one-page checklist beside every machine, and never let knowledge live in one person’s head. Good onboarding cuts fake “faults,” protects chair time, and makes staff turnover painless. We at Hongdee build the training support into every order.